For detailed information, other images and documents, please select individual articles from the following table.
Insulation anchor SHARK® ISO A2 stainless steel, set
For securing guttering down pipes in compression-resistant insulating materials
Register now and access more than 125,000 products
Variants
Register now and access more than 125,000 products
- Pre-assembled with a M10x12 A2 stainless steel stud screw
- Works in all common compression-resistant insulating materials
- Screws in perfectly without pre-drilling the insulation material
- For thin plaster layers < 4 mm, no pre-drilling is required
- Quick and inexpensive mounting without the formation of thermal bridges
- Resistant to rotting, weathering and ageing (high quality PP)
- For processing with cordless screwdriver
- Attachment via positive locking
- Applicable temperature range: -20°C to +100°C
- Application in compression-resistant insulating materials with or without plaster
- SHARK® ISO A2 stainless steel set may be used outdoors or in wet rooms
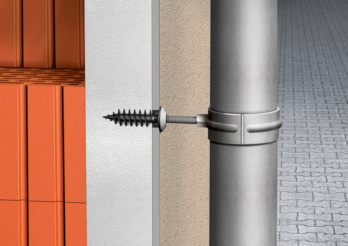
Rain pipe mounting with insulation anchor SHARK® ISO 95
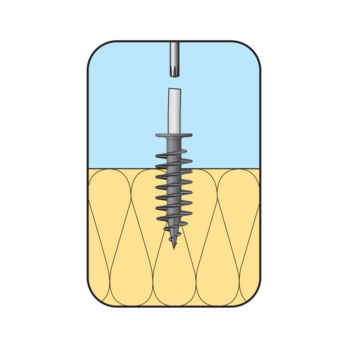
Screw in anchor without pre-drilling
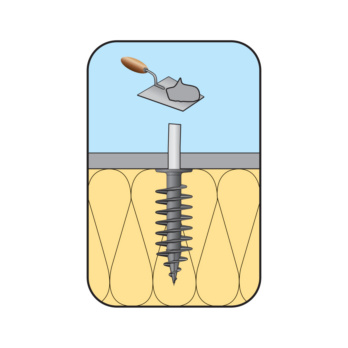
Apply the plaster layer and remove the protective cap after drying
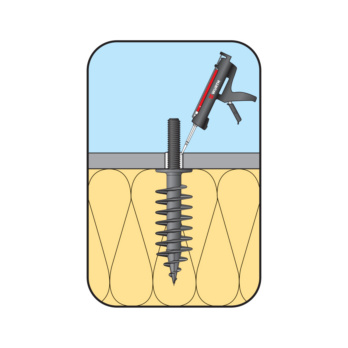
Fill the cavities between the plaster and stud screw with silicone
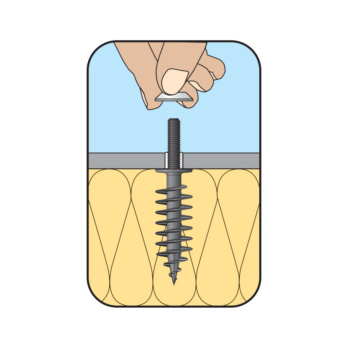
Screw on the cover rosette
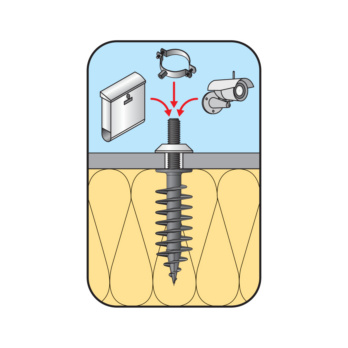
Secure component
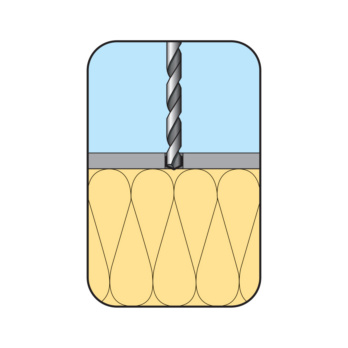
Pre-drill the plaster until the insulation layer
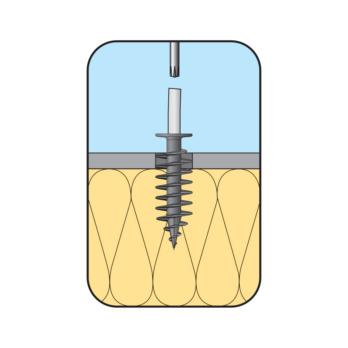
Screw the dowels into the pre-drilled hole and remove the protective cap

Fill the cavities between the plaster and stud screw with silicone

Screw on the cover rosette

Secure component
- For securing guttering down pipes (clamp) in conjunction with pre-assembled stud screw
- Prior to assembly, regional regulations governing securing guttering down pipes must be checked
- Readjustment of the pre-assembled screw is not guaranteed for wood fibre insulation materials subject to particular friction (screw cannot be loosened again)
- It is recommended to process the dowels and screws separately in order to enable re-adjustment in the wood insulation material
Select RAL-colour code
!! NOTE: On-screen visualisation of the colour differs from real colour shade!!


