


For detailed information, other images and documents, please select individual articles from the following table.


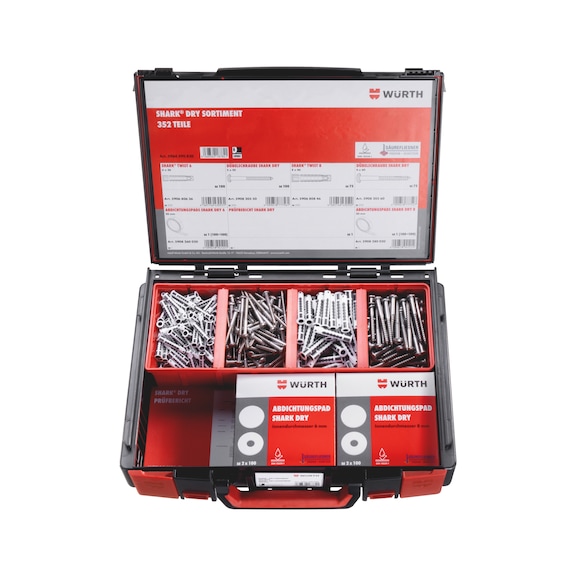
SHARK DRY waterproof fixing set 352 pieces in system case 4.4.1
The tested SHARK DRY fixing system for sealing drill holes comes in a practical assortment case with all the necessary system elements for secure, tested and waterproof fastening - including test report as proof of performance

Register now and access more than 125,000 products


Variants
Register now and access more than 125,000 products
- All-in-one assortment case for a tested, waterproof fastening in wet rooms
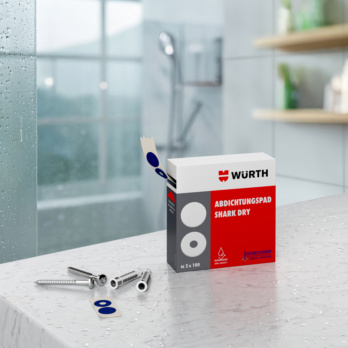
- The SHARK DRY sealing pads in conjunction with SHARK TWIST fixings, in addition to the A2 screws for SHARK DRY, ensure a tested, waterproof fastening
- Meets the requirements for drill hole seals in accordance with DIN 18534
- Can be used indoors for load classes W0-I (low), W1-I (moderate), W2-I (high), W3-I (very high)
- Tested in accordance with PG-AIV-F and EAD 030352-00-0503
- Tested by Säurefliesner e.V.
- The test report is included in the assortment case
Test report 101462401.001 in accordance with EAD 030352-00-0503, complies with testing principles for issuing general construction test certificates for sealing in conjunction with tile and panel covering part 1. (PG-AIV-F)


Test report 101462401.001 in accordance with EAD 030352-00-0503, complies with testing principles for issuing general construction test certificates for sealing in conjunction with tile and panel covering part 1. (PG-AIV-F)
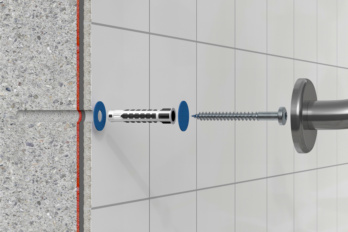
The SHARK DRY A2 screw for fixings is ideal for reliable sealing/fastening solutions in wet rooms in conjunction with the SHARK TWIST multi-purpose fixing and the corresponding A2 screws.
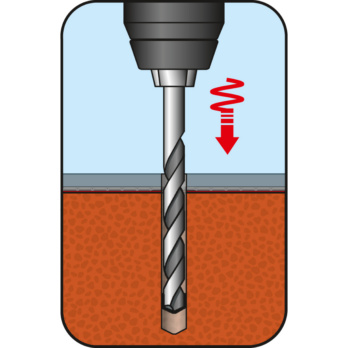
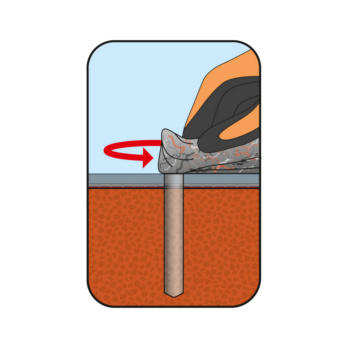
- 1. Drill the hole
- 2. Remove the drill debris from the drill hole
- 3. Ensure that the surface around the drill hole is free of dust and grease
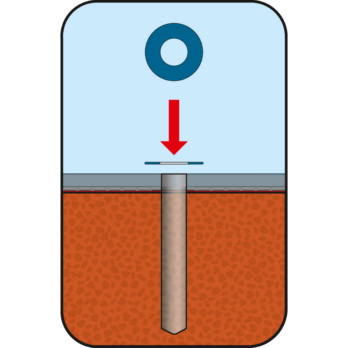
- 4. Position the sealing pad with the centre hole first
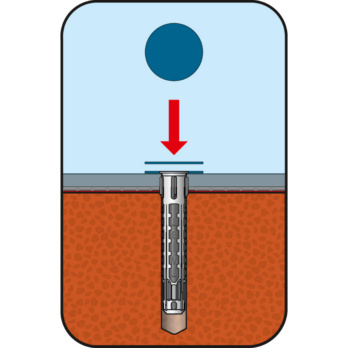
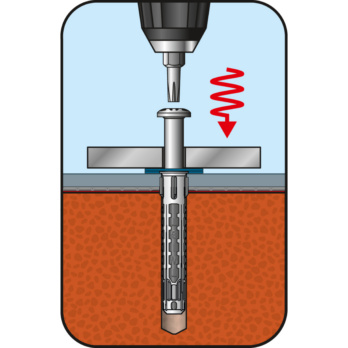
- 5. Insert the SHARK TWIST fixing into the drill hole
- 6. Position the second pad (without hole) centrally on the fixing
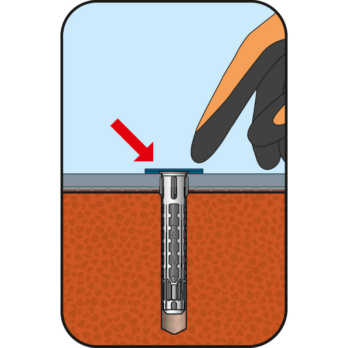
- 7. Use your finger to press the pads around the collar
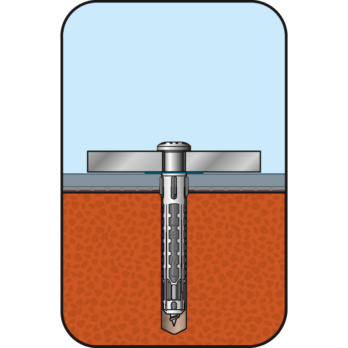
- 8. Screw the stainless steel screw through the fixture until the screw head rests on it
Select RAL-colour code
!! NOTE: On-screen visualisation of the colour differs from real colour shade!!