


For detailed information, other images and documents, please select individual articles from the following table.
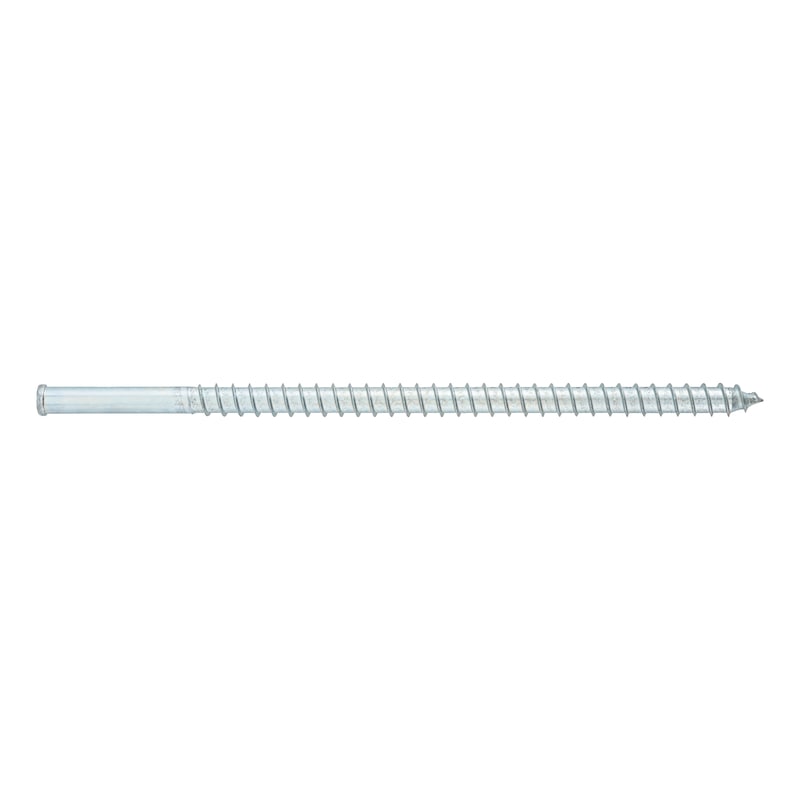


Screw for AMO-Therm Mini stand-off installation system
For anchor-less fastening of light to medium loads in insulated façades with thermal break. Anchoring through the insulation in masonry

Register now and access more than 125,000 products
Variants
Register now and access more than 125,000 products
- The AMO-Therm Mini stand-off installation system enables anchor-less fastening of light to medium loads in insulated façades, while maintaining thermal break.
- The screw is anchored through the insulation directly into the masonry and ensures secure and stable fastening.
- A single screw length covers insulation thicknesses from 60 mm to 200 mm, and therefore the length of thread engagement can be easily adjusted depending on the insulation thickness.
- Available separately is an adapter with a formed M8/M10 internal thread that consists of two half shells that can be clipped together over the screw shank.
- For additional safety, it is recommended that the adapter is pressed together at the front and rear using combination pliers.
- The adapter does not sit tightly around the screw head, which allows both elements to be rotated separately.
- Use the adapter to connect ASSY-D screws.
- Down pipe mounting with M10x45 mm threaded stud in A2 stainless steel, including collar and sealing washer.
- Thermal-bridge-free mounting in masonry ensures efficient insulation.
This screw can only be used in conjunction with the adapter for the AMO-Therm Mini stand-off installation system. A special drill bit for concrete and another for masonry are included in the set. Please observe the recommendations mentioned under Accessories.
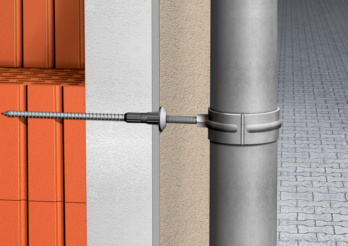
Spacer installation system AMO®-Therm Mini: Downpipe attachment in masonry
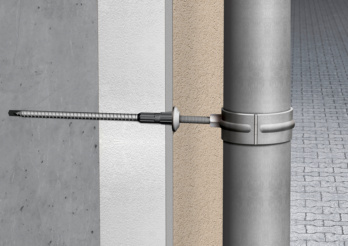
Spacer installation system AMO®-Therm Mini: Downpipe attachment in concrete
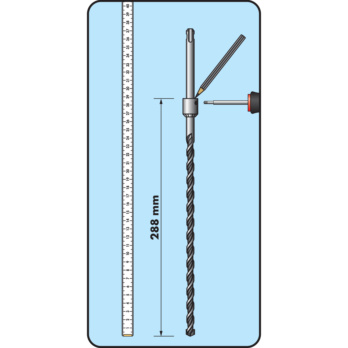
Mount the countersink on the drill bit
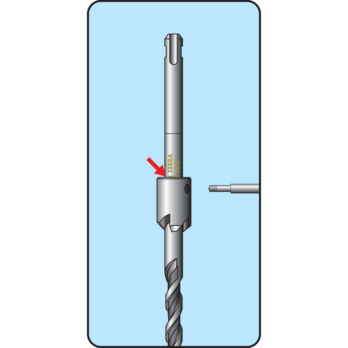
Observe the marking
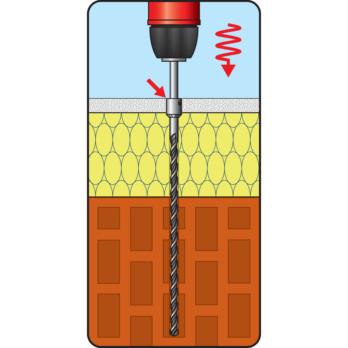
Drilling core hole and countersink in one step. The generally required drilling depth of 288 mm is achieved when the end of the countersink is flush with the surface of the wall plaster
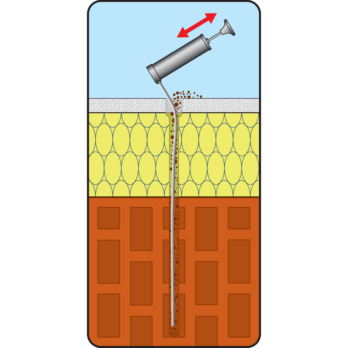
Remove drill cuttings from drill hole
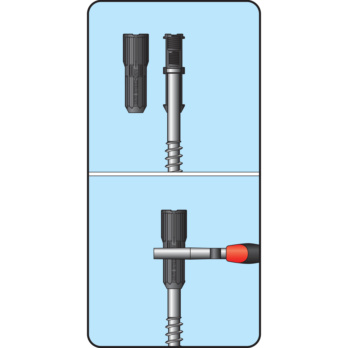
The adapter offers an M8/M10 combination connection.
The two half-shells are clipped together centrally over the screw shaft using combination pliers. As a precaution, use the combination pliers to press the adapter together at the top and bottom. The adapter does not sit tightly around the screw head, both elements can be rotated separately
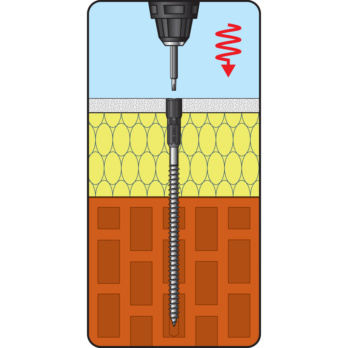
The drive is reached with a 70-mm bit, the screw is screwed into the base material flush with the surface (plaster or insulation). The adapter is then adjusted with a 1-mm protrusion. As soon as the outer bars of the adapter are able to engage in the insulation, the adapter no longer turns with the rest of the unit
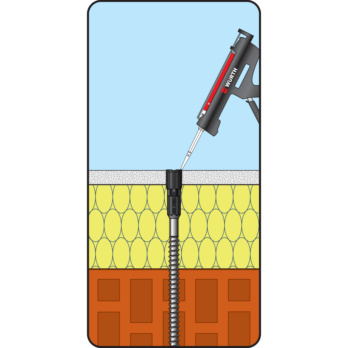
Fill the ring gap with window and façade sealant
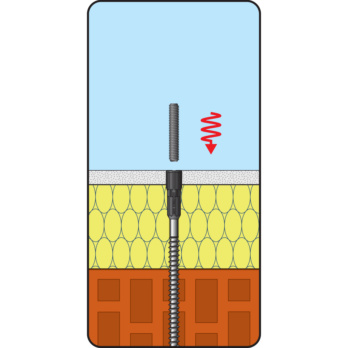
Installation of downpipe clamp: Screw threaded rod M10 flush into the adapter
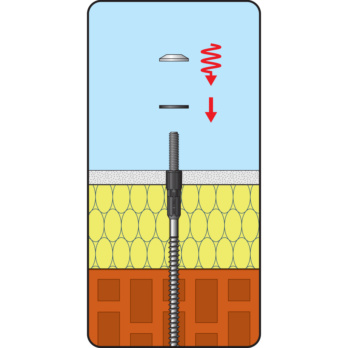
Remove the adhesive film from the sealing washer and push over the threaded rod flush to the surface with the adhesive coating facing up
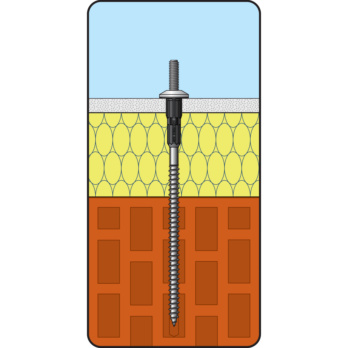
Screw on the collar flush
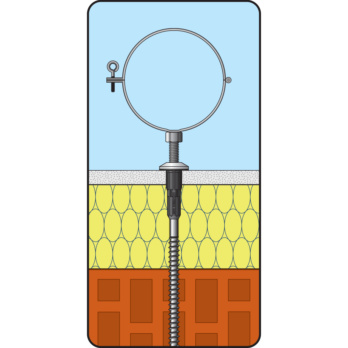
Screw on the downpipe clamp
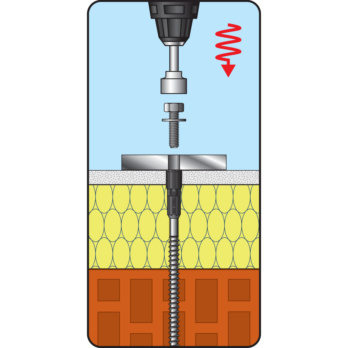
Installing M10/M8: The attachment is fastened with a suitable screw
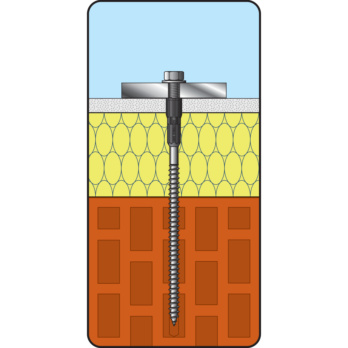
Screw in screw until flush
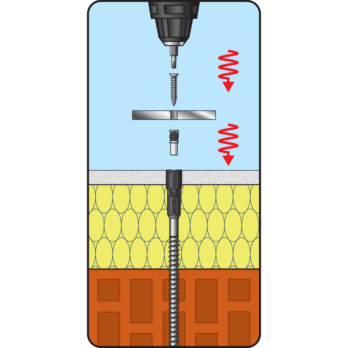
The supplied insert is screwed into the M10 thread, thus creating a mounting option for an ASSY-D® screw ∅ 4-5
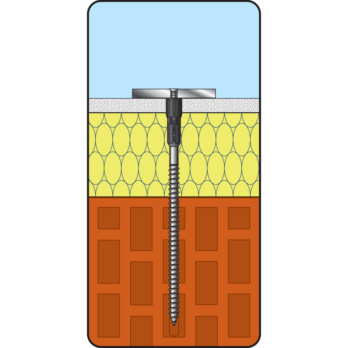
Screw in screw until flush
For mounting light to medium loads (letterboxes, lamps, surveillance cameras or guttering down pipes (multiple mounting) in insulated façades with or without plaster.
Fill the ring gap between the insulation and the adapter with a suitable sealant. Window and façade sealant, art. no. 0892320010 is recommended.
Select RAL-colour code
!! NOTE: On-screen visualisation of the colour differs from real colour shade!!